Complete Guide to Choosing the Right Monitor Setup: Single, Dual, Ultrawide, and How to Match Screens to Your Work
Sarah Chen, CAP, walks through choosing a monitor setup by workflow — single vs dual vs ultrawide vs vertical, the right size and resolution, how to mount and connect it, and three example builds by budget.
Updated
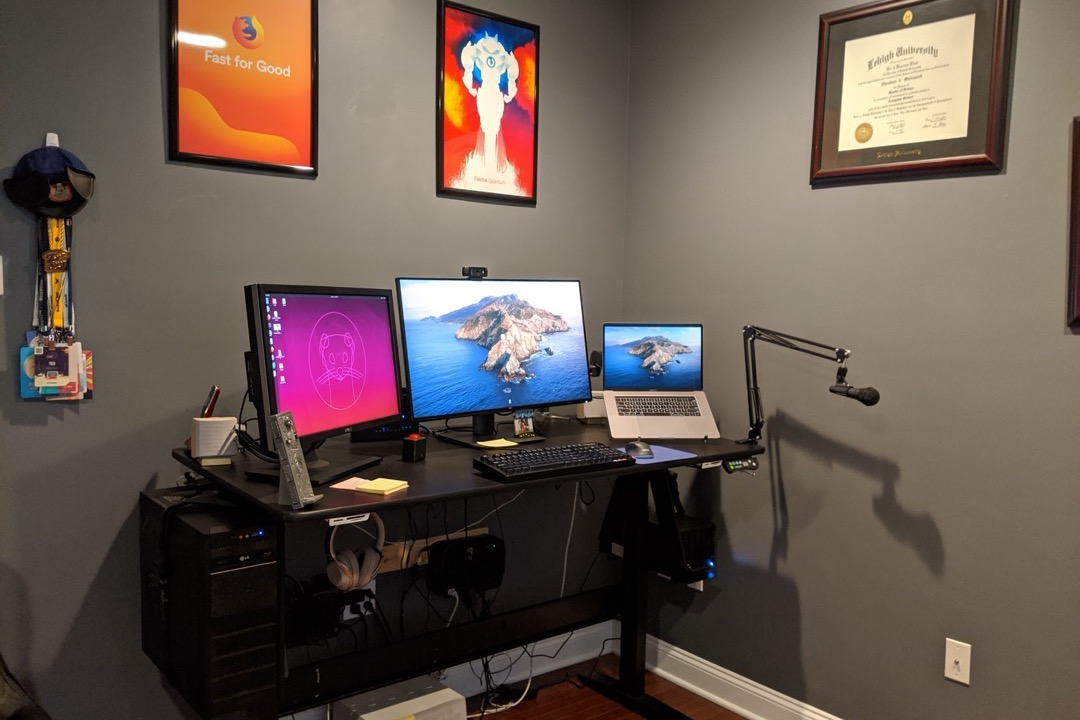
Most monitor-buying advice starts in the wrong place. It opens with a spec sheet — refresh rates, response times, color gamut percentages — as if the goal were to win an argument about panels. But the people I help set up workstations almost never have a panel problem. They have a matching problem: the screen configuration they bought does not fit the shape of the work they do all day. A single ultrawide handed to someone who needs a dedicated email-and-chat screen. Two mismatched monitors handed to a video editor who wanted one continuous timeline. A gorgeous 4K panel that they immediately scaled up to 150 percent, throwing away the resolution they paid for.
After years coordinating equipment for distributed teams as a Certified Administrative Professional — and fielding the same “which monitor should I get” question from dozens of new hires — I have a decision order that works: figure out your workflow first, then the configuration, then size and resolution, then how you mount and connect it. This guide walks that order start to finish, and ends with three example builds by budget so you can see the decisions assembled. This is a choosing guide; for dialing in the heights, angles, and distances once the hardware is on your desk, our companion ergonomic desk setup guide has the exact numbers.
Start With Your Workflow, Not the Hardware
The single most important input is not a number on a box — it is an honest description of what you look at all day and how many things you need visible at once. Every downstream decision flows from this.
Ask yourself which of these describes your day. Single-application focus — you spend most of the day inside one large program: a design canvas, a CAD environment, a long video or audio timeline, a trading terminal. Primary-plus-reference — you work in one main application but need email, a chat tool, a reference document, or source material permanently visible alongside it. This is the most common pattern in office and knowledge work. Heavy reading or data entry — you scroll through long documents, code, spreadsheets, or feeds, and the vertical dimension matters more than the horizontal. Mixed and mobile — you split time between a home office and an office office, and your laptop is the constant.
Hold that answer in mind, because it maps almost directly onto a configuration. Single-application focus wants one big continuous surface. Primary-plus-reference wants two screens or an ultrawide. Heavy reading wants a tall or vertical screen. Mixed-and-mobile wants a dock-and-go setup built around a laptop. Notice what we have not talked about yet: brand, resolution, refresh rate. Those come later, and they are easy once the shape is right.
Single vs. Dual vs. Ultrawide vs. Vertical
There are four practical configurations, and each solves a different problem. Here is how they compare on the dimensions that actually drive the decision.
| Configuration | Best For | Strengths | Tradeoffs |
|---|---|---|---|
| Single standard (24–27”) | Focused single-app work, small desks, tight budgets | Cheapest, simplest, smallest footprint, one cable | No room for a permanent second surface; window-switching tax |
| Dual monitors | Primary-plus-reference work (most office jobs) | Physical boundary between screens; each positioned independently; add a vertical one later | Center bezel; needs two video outputs; more desk width |
| Ultrawide (34–49”) | Wide continuous content, side-by-side comparison, bezel-haters | One bezel-free surface; one cable; often one-cable USB-C power too | Both halves locked to same height/distance; needs desk depth; pricier |
| Vertical secondary | Reading long docs, code review, chat/monitoring feeds | Sees far more of a document at once; less scrolling | Specialist role only; awkward for wide content; needs a rotating mount |
A few decisions inside this table are worth spelling out. Dual monitors are the default for a reason — the physical gap between screens is a feature, not a bug, because it lets your brain assign “main work” to one screen and “everything else” to the other. An ultrawide is the right call when your main content is genuinely wide and continuous and the center bezel of a dual setup would cut through it. A 49-inch super-ultrawide is essentially two 27-inch monitors fused into one seamless panel, so it is a legitimate dual replacement for people who hate the bezel. And the vertical monitor is almost always an addition, not a base — one main horizontal screen plus a rotated secondary for reading. To rotate a monitor into portrait orientation you need a mount that supports it, which is one of several reasons the best monitor arms matter more than people expect; a fixed stand cannot rotate.
Choosing Size and Resolution — One Decision, Not Two
People treat size and resolution as separate specs. They are the same decision, because what your eyes actually care about is pixel density — pixels per inch — which is just the ratio of resolution to size. A high resolution on a huge screen can be less sharp than a modest resolution on a small one.
Here is the practical map for office and knowledge work.
| Size | Best Resolution | Approx. Pixel Density | Verdict |
|---|---|---|---|
| 24” | 1080p (1920×1080) | ~92 PPI | Budget baseline; fine for docs and email |
| 27” | 1440p (2560×1440) | ~109 PPI | The office sweet spot — sharp text, no scaling needed |
| 27” | 4K (3840×2160) | ~163 PPI | Only if you work with fine images/video; you will scale it |
| 32” | 4K (3840×2160) | ~138 PPI | Excellent for detailed work; 4K earns its price here |
| 34” ultrawide | 3440×1440 | ~110 PPI | The standard productivity ultrawide |
| 49” ultrawide | 5120×1440 | ~109 PPI | Dual-27” replacement in one panel |
Read it this way. The 27-inch 1440p panel is what I recommend to most people — it hits roughly 109 PPI, which is sharp enough that you never think about the pixels, and it does not force you to scale the interface up and give back the screen space you paid for. 1080p is fine up to 24 inches and starts looking soft beyond that; a 27-inch 1080p panel has visibly chunky text. 4K only earns its cost on 27-inch-and-larger screens — on a 24-inch panel the extra pixels are invisible, and even on a 27-inch you will typically run it scaled at 150 percent, which negates much of the real-estate benefit. On a 32-inch, 4K is genuinely worth it. As for refresh rate: 120Hz or 144Hz makes scrolling and cursor movement look smoother, but it is a comfort bonus, not a productivity lever for office work. Spend your budget on size and resolution first; treat high refresh as a bonus if it comes along for free.
Panel Type and Eye Comfort for Long Days
One spec worth understanding, because it affects how a screen feels over an eight-hour day rather than how it looks in a store: panel type. Almost every monitor uses one of three technologies, and for office work the choice is easy. IPS panels have the widest viewing angles and the most consistent color and brightness across the screen, which is exactly what you want when you glance at a monitor from a slight angle or share it in a meeting — this is the right default for office work. VA panels have deeper contrast but colors and brightness shift as your viewing angle changes, which is a minor annoyance on a wide or shared screen. TN panels are the cheapest and fastest but have the narrowest viewing angles and washed-out color off-axis; they exist mostly for competitive gaming and are the wrong choice for a workstation. When in doubt, choose IPS and stop thinking about it.
Eye comfort over a full workday comes down to a few things the spec sheet does not always advertise. Look for a flicker-free rating — cheaper monitors dim the backlight by rapidly switching it on and off, and while you cannot consciously see the flicker, it contributes to the headachey fatigue some people get by mid-afternoon. A matte (anti-glare) finish rather than a glossy one keeps reflections from windows and overhead lights from fighting your content. And the single biggest comfort lever is not a panel spec at all — it is brightness matched to the room, which is why a good adjustable desk lamp that lets you balance ambient light against the screen does more for end-of-day eye comfort than any premium panel feature. For the full breakdown of viewing distance, tilt, and the 20-20-20 rule that keeps eyes fresh, the ergonomic desk setup guide covers the calibration side.
The Laptop Question — Building the Setup Around a Dock
For a large and growing share of workers, the “computer” is a laptop, and the monitor setup is really a docking setup. This is its own configuration, and it is one of the highest-value ones to get right because a laptop is the least ergonomic device in common use — the screen and keyboard are fixed together, so one of them is always in the wrong place.
The fix is to stop thinking of the laptop as the screen and start thinking of it as the brain. Raise the laptop on a laptop stand so its built-in screen sits near eye level as a genuine second display, add an external keyboard and mouse at the correct height, and put your main external monitor front and center. Then connect the whole thing through a single USB-C docking station that carries video, power, wired network, keyboard, and mouse over one cable. The payoff is that arriving at your desk becomes a one-cable action: plug in, and the laptop drives a full multi-screen workstation. Unplug, and you walk away with a laptop. If you are building a hybrid home-and-office setup from scratch, our home office setup guide covers the rest of the room around this dock-and-go core.
One caution for the laptop-as-second-screen approach: only elevate the laptop if you will actually use its screen for meaningful work. If you only glance at it occasionally, a simple riser is enough. If it is a real second work surface, treat it like any monitor and get its top edge near eye level — otherwise you have just built yourself a neck-strain reference screen.
How You’ll Mount It — Arm vs. Stand vs. Riser
How you hold the screens up is a real decision, not an afterthought, and it interacts with the configuration you chose. There are three options.
A monitor arm clamps to the back of the desk and holds the screen on an adjustable articulated mount. It frees the entire desk surface underneath, lets you set height, depth, tilt, and rotation independently, and — critically — makes dual-monitor geometry and vertical rotation actually achievable. If you went dual, or you want the option to rotate a screen to portrait, or more than one person uses the desk, an arm is the right answer. The best monitor arms roundup covers single and dual models with the vertical adjustment range that makes them worth the premium.
A monitor stand — the riser the monitor sits on, sometimes with a shelf underneath — is cheaper, rock-solid stable, and genuinely fine when a single monitor lives at one fixed, correct height for one person. If you are not rotating, not sharing the desk, and not running dual, a good monitor stand does everything you need and costs a fraction of an arm. A basic riser is the simplest version, mostly for lifting a laptop or a small single monitor a few inches. Match the mount to the job: dual and rotating setups want arms; a solo fixed monitor is perfectly happy on a stand.
Connectivity and Cable Planning
A monitor setup is only as pleasant as its cabling, and this is the step people skip until it bites them. Two things to verify before you buy.
First, match the ports. Count your computer’s video outputs and their types — HDMI, DisplayPort, USB-C — and make sure you have enough of the right kind for the number of monitors you are connecting. Also confirm the port version supports the resolution and refresh you bought; an older HDMI port can silently cap a 4K monitor at a sluggish 30Hz. For dual monitors from a laptop, you often need a dock or the right USB-C setup, because most laptops cannot drive two external displays from their built-in ports alone.
Second, plan the routing before you buy, not after. The cleanest monitor setup in the world is ruined if pulling your chair in snags a cable or if a nest of wires hangs visibly off the desk edge. A few adhesive channels or a under-desk tray turns a tangle into an invisible run — our cable management picks cover the trays and sleeves that make a multi-monitor desk look intentional. This is also the moment to route the cables for the rest of the desk — the desk lamp, the webcam on top of your primary monitor, the keyboard and mouse — so everything reaches its outlet without crossing your leg room.
Fitting the Setup to Your Desk and Room
The best configuration on paper is the wrong one if it does not fit the space you have. Before you commit to a size or a count, measure two things: the usable depth of your desk (front edge to wall, minus anything already there) and the usable width.
Depth drives how large a screen you can comfortably view. A 32-inch or ultrawide monitor wants roughly 30 inches of viewing distance so you are not turning your head to see the edges; on a shallow desk pushed against a wall, that same monitor forces you too close and you spend the day scanning. Width drives how many screens fit — two 27-inch monitors need about 48 inches of clear width to sit side by side without crowding. If your desk is short on either dimension, a monitor arm buys you back depth (it pushes the screen back over the desk edge and floats it above the surface) and a single ultrawide can be more space-efficient than two separates.
Two more room factors matter. Glare: position the desk so windows fall to the side rather than behind or in front of the screens, or you will fight reflections all day. Desk edge: a monitor arm needs an edge sturdy and the right thickness to clamp to — check the arm’s clamp range against your desk before ordering. And if your desk is a sit-stand model, remember the whole setup moves with it; a good standing desk paired with a monitor arm keeps the screens at the right height in both sitting and standing positions, which a fixed stand cannot do.
Putting It Together — Three Example Builds
Here is how the decisions assemble into complete setups at three levels. Each starts from the workflow, not the wishlist.
The essentials build (single-application or budget). One 27-inch 1440p monitor on a stable monitor stand, connected by a single cable, with a keyboard and mouse at the correct height. This is the right setup for focused single-app work, tight desks, and anyone who does not need a permanent second screen. It is the most cost-effective productivity setup that still gets the fundamentals right.
The productivity build (primary-plus-reference, most office work). Two 27-inch 1440p monitors on a dual monitor arm so you can dial in matched height and angle, one positioned as your primary screen and the other as a reference-and-communication screen. Add an ergonomic keyboard and a comfortable mouse, and route everything with a cable management tray. This is the setup I spec for most knowledge workers — the second screen pays for itself in the window-switching it eliminates.
The hybrid build (mixed and mobile). A laptop as the brain, raised on a laptop stand as a second screen, driving one 34-inch ultrawide (or a single large monitor) as the main surface, all joined through a USB-C docking station so the whole rig connects and disconnects with one cable. Add a webcam on the monitor for meetings, since laptop cameras point up your nose once the laptop is elevated, and a USB headset if calls dominate your day. This is the setup for anyone splitting time between locations who wants a full workstation that collapses to a bag in ten seconds.
Whichever build fits your work, the decision order is the thing to hold onto: workflow first, then configuration, then size and resolution, then mounting and cabling. Get that sequence right and the specs sort themselves out — and once the hardware is on the desk, hand it to the ergonomic setup guide to dial in the heights and angles that turn a good setup into a comfortable one.
Frequently Asked Questions
Is one ultrawide monitor better than two separate monitors?
What size and resolution monitor is best for office work?
Can I use my laptop as a second monitor in my setup?
How many monitors do I actually need to be more productive?
Is a curved monitor better for working at a desk?
Related Articles
Ergonomic Desk Setup Guide: Exact Measurements, Angles, and Adjustments for Pain-Free Work
desk-setup-furniture
How to Set Up the Perfect Home Office: A Step-by-Step Guide
desk-setup-furniture
7 Best Monitor Stands of 2026
desk-setup-furniture
7 Best Monitor Arms of 2026
desk-setup-furniture
7 Best Cable Management Solutions of 2026
desk-setup-furniture
About the Reviewer

Sarah Chen, CAP, PMP
B.A. Business Administration, UCLA
Sarah Chen spent 10 years in office management and operations at Fortune 500 companies before founding DeskRated in 2026. After managing supply budgets for teams of 50+ people and testing thousands of products through daily use, she started writing the honest, no-fluff supply reviews that office professionals actually need. Sarah holds both CAP and PMP certifications and is based in Los Angeles.