Home Office Lighting Guide: Reduce Eye Strain and Look Better on Video Calls
Sarah Chen, CAP, on home office lighting done right — the real lux, Kelvin, and CRI numbers, desk lamp placement, bias lighting, and three-point video-call lighting.
Updated
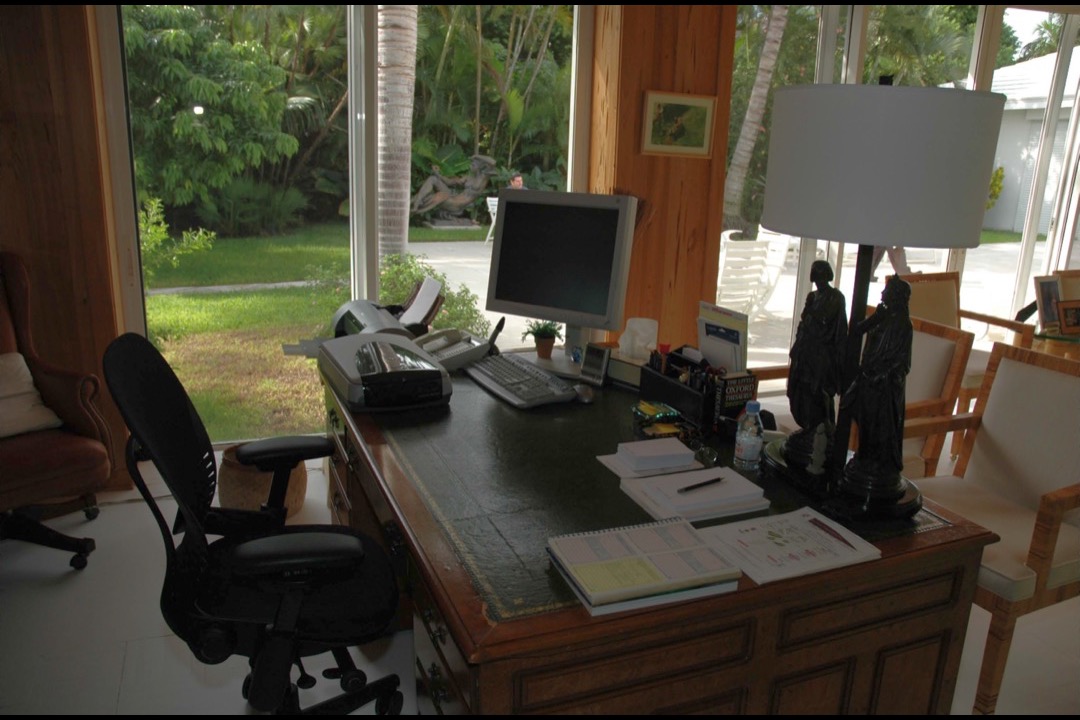
Most home office setups are built around the desk, the chair, and the monitor, and then lit by whatever ceiling fixture the room happened to come with. That is backwards. Lighting is the cheapest single upgrade you can make to a workspace, and it does more for how you feel at 4 p.m. — and for how you look on a video call at 4 p.m. — than almost anything else on the desk. Yet it is the piece almost everyone leaves to chance.
I have spent several years as a Certified Administrative Professional coordinating and outfitting workspaces for distributed teams, and lighting is the complaint I hear most often once people have sorted out their chair and monitor. The symptoms are always the same: eyes that burn by mid-afternoon, headaches that arrive with the evening, and the vague sense of looking washed out or shadowy every time the webcam turns on. This guide fixes all three. We will cover the real numbers that separate good lighting from bad — lux, color temperature, and CRI — then the practical placement of a task lamp, the window rule that most people get wrong, the bias-lighting technique that quietly solves screen fatigue, and finally a proper three-point setup so you look intentional rather than accidental on camera. If you are building the wider workspace from scratch, pair this with our ergonomic desk setup guide and the broader home office setup walkthrough — lighting is one layer of a system, and it works best when the rest of the system is calibrated too.
Signs Your Home Office Lighting Is Hurting You
Before we get into numbers, it is worth learning to read the symptoms, because lighting problems rarely announce themselves as lighting problems. They show up as eye strain, fatigue, and a face that looks wrong on camera, and people blame screen time, poor sleep, or a bad webcam. More often the real culprit is the light in the room.
Here is the diagnostic logic I use. Eyes that burn or feel gritty by mid-afternoon, especially in a dim room, usually mean your screen is much brighter than its surroundings — the eye spends all day adjusting between the bright display and the dark space around it, and that constant recalibration is exhausting. Headaches that build through the afternoon frequently trace back to a flickering LED bulb or a harsh overhead fixture creating glare you are not consciously aware of. Squinting at documents or fine print is a straightforward signal that your task area is under-lit — you are below the 300-lux floor that reading comfortably requires. A washed-out, flat, or shadowy face on video calls means the light is coming from the wrong direction: overhead light casts shadows into your eye sockets and under your nose, while a bright window behind you turns you into a silhouette. And trouble winding down after evening work can come from cool, bright light late in the day suppressing the natural drop in alertness that should happen as evening arrives.
If any of those sound familiar, the rest of this guide is the fix. The good news is that lighting problems are among the easiest and least expensive to solve — often a single well-placed lamp and a change in desk orientation does most of the work.
The Three Layers of Home Office Lighting
Good lighting is not one bright source. It is three layers working together, each doing a different job. Get all three right and the room reads as comfortable and even; miss one and the whole space feels off, no matter how powerful the light you throw at it.
Ambient light is the general fill that lights the whole room — usually a ceiling fixture, sometimes a floor lamp bouncing light off the walls and ceiling. Its job is to keep the overall space from feeling like a cave and to prevent the desk from becoming an isolated bright island in a dark room. Ambient light should be present but soft; it is the background, not the star.
Task light is the focused, brighter light aimed at your actual work — your desk surface, keyboard, and any paper you handle. This is the layer most people are missing entirely. A dedicated desk lamp or a monitor light bar delivers the 300 to 500 lux that reading and writing comfortably require, concentrated exactly where you need it, without over-lighting the whole room. If you buy one new light after reading this guide, make it a task light; our roundup of the best desk lamps is built around exactly this layer.
Accent light is the softer background layer that shapes the space and, critically for screen work, reduces the contrast between your monitor and the wall behind it. Bias lighting — a strip of light behind the monitor — is the most useful accent light for a home office, and we will come back to it in detail below. Accent light is the layer that separates a workspace that merely functions from one that feels genuinely comfortable to sit in for eight hours.
The framework is simple: aim for all three layers, keep the task layer brightest and most focused, keep the ambient layer soft and even, and use the accent layer to smooth out the harsh contrast that screens create. Almost every lighting complaint I hear comes down to a missing layer rather than a lack of total brightness.
Lux, Color Temperature, and CRI: The Numbers That Actually Matter
This is the section nobody else puts in one place. Lighting has three measurable properties that determine whether it helps or hurts, and you can specify all three before you buy. Ignore the marketing language about “eye-care technology” and look at these numbers instead.
Lux — how much light lands on your work. Lux measures illuminance, the amount of light actually reaching a surface. For a home office, the targets are well established by OSHA and the Illuminating Engineering Society:
| Zone | Target Lux | What It Feels Like |
|---|---|---|
| Task area (desk, keyboard, documents) | 300–500 lux | Bright enough to read fine print with zero squinting |
| Ambient (rest of the room) | 150–300 lux | Clearly lit but noticeably softer than the desk |
| Detailed close work (drafting, crafts) | 500–750 lux | Very bright, focused pool of light |
You can measure lux with a free phone app accurate enough for this purpose. The common failure is a task area sitting well under 300 lux while the room around it is under-lit too — the desk ends up as a dim pool, and the eyes strain to read.
Color temperature — the warmth or coolness of the light, in Kelvin. Lower Kelvin numbers are warmer (more orange); higher numbers are cooler (more blue-white). The right number depends on the time of day:
| Time / Use | Color Temperature | Character |
|---|---|---|
| Daytime focused work | 4000–5000K | Neutral to cool white, daylight-like, keeps you alert |
| Evening / winding down | 2700–3000K | Warm white, relaxed, does not disrupt sleep timing |
| Avoid for sustained work | 6000K+ | Harsh blue-white, reads as clinical and fatiguing |
The ideal fixture is tunable across the whole 2700K to 5000K range so one lamp handles both phases of your day. Cool light in the morning supports alertness; warm light in the evening lets your body wind down naturally, which is the genuine, evidence-based version of the “blue light” concern.
CRI — how accurately the light shows color. Color Rendering Index runs to 100 and measures how faithfully a light source reproduces color against natural daylight. Aim for CRI 90 or higher for any light you work under. Below CRI 80 — where most bargain LED bulbs sit — colors look dull and slightly wrong, and the eye works harder to interpret them, which quietly adds to fatigue over a long day. For color-critical work like design, photo, or video, pay for CRI 95-plus. The spec is often omitted on cheap fixtures, and that omission is usually a sign the number is low.
Specify all three — 300 to 500 lux on the task area, 4000 to 5000K for daytime, CRI 90-plus — and you have eliminated the great majority of lighting-driven eye strain before the lamp even arrives.
Placing Your Desk Lamp and Task Light Correctly
Buying the right lamp is half the job; placing it correctly is the other half. A good lamp in the wrong position creates as much glare as a bad one. Three placement rules cover almost every desk.
Height: 16 to 24 inches above the desk surface. A task lamp should sit roughly 16 to 24 inches above the work area — high enough to spread an even pool of light across the desk, low enough to keep that light concentrated where you need it. Too low and the light covers only a small patch and the bare bulb creeps into your field of view; too high and the light spreads thin and stops delivering your task-level lux. An articulated arm lamp makes this easy to dial in because you can raise, lower, and angle the head independently.
Angle: 30 to 45 degrees, raking across the desk. Aim the light so it comes down and across the surface at roughly a 30-to-45-degree angle rather than straight down or straight at you. Light that rakes across the desk from the side illuminates the surface fully while keeping the bright emitter out of your eyeline and off your screen. Light aimed straight down creates a small hotspot with hard shadows; light aimed toward you is just glare.
Position: opposite your dominant hand. Place the lamp on the side opposite the hand you write with — a right-handed person puts the lamp on the left, and vice versa. This is the oldest rule in the book and still the best one: it stops your own writing hand from casting a shadow across the page or keyboard as you work. If you handle a lot of paper, this single adjustment removes a shadow you have probably been fighting without noticing.
One more note for small desks: if there is genuinely no room for a lamp, a monitor light bar that clamps to the top of the screen delivers task-level light to the keyboard and desk with zero footprint, and because it sits above and behind the top edge of the monitor it puts no glare on the screen or in your eyes. It is the cleanest task-light solution for a cramped setup, and it pairs naturally with a monitor arm that has already freed up the space beneath the screen.
Natural Light and Window Positioning
Natural light is the best light you have access to — it is full-spectrum, high-CRI by definition, and genuinely good for mood and alertness. But only if you position your desk correctly relative to the window. Get this wrong and the same daylight that should energize you becomes the single biggest source of glare and eye strain in the room.
The rule is perpendicular: put the window to your side, not in front of you and not behind you. Sit side-on to the glass so the daylight rakes across your desk rather than hitting your eyes or your screen.
Here is why the other two orientations fail. If you face the window, the bright outdoor scene sits directly behind your monitor. Your eyes spend the entire day recalibrating between the relatively dim screen in the foreground and the blazing brightness behind it — that constant adjustment is one of the most common and least-recognized causes of screen fatigue. If you put your back to the window, the daylight pours over your shoulder and reflects straight off the screen as glare, washing out the display and forcing you to crank monitor brightness to compensate. On video calls, backing onto a window is even worse: the camera exposes for the bright background and turns you into a dark silhouette.
Side-on positioning solves all of it. The window becomes a soft, large, flattering light source to one side — excellent for both your eyes and your on-camera appearance — with no glare on the screen and no bright scene fighting your display. If your room’s layout genuinely forces a facing or backing arrangement, an adjustable blind or a sheer curtain lets you soften the light through the day, and repositioning the monitor on a monitor arm or stand to change its angle relative to the window can recover a lot of the lost comfort. Our monitor setup guide covers the geometry of angling the screen to dodge window glare in more detail.
Bias Lighting and Monitor Light Bars: What They Do and When You Need One
These two techniques get lumped together because both involve a light near the monitor, but they do opposite jobs, and understanding the difference tells you which one you actually need.
First, the mechanism that makes bias lighting work, because nobody explains it and it is the key to the whole thing. The eye strain from screen work is largely a contrast problem. When a bright monitor sits against a dark wall, your pupils are caught between two extremes — they want to constrict for the bright screen and dilate for the dark surroundings, and they cannot do both, so the muscles that control them work continuously all day. That sustained effort is a real and underappreciated driver of the burning, tired-eye feeling that builds by evening. Reduce the gap between screen brightness and surround brightness, and you take that load off the eye.
Bias lighting does exactly that. It is a strip of light — often an LED strip taped to the back edge of the monitor — that washes the wall behind the screen with a soft glow. It does not light your desk or your work; its only job is to raise the brightness immediately around the monitor so the screen is no longer a bright rectangle floating in darkness. The effect on late-night or dim-room screen fatigue is immediate and larger than people expect. For neutral color accuracy, run bias lighting at around 6500K (daylight white) so it does not tint your perception of the screen’s colors.
A monitor light bar is a different tool for a different problem. It clamps to the top of the monitor and points down and forward onto your desk and keyboard — it is a task light, not an accent light. Its trick is that, because it sits above the top edge of the screen and aims downward, it lights your work surface without casting any light or glare onto the screen itself and without shining into your eyes. It is the ideal task light for a desk too small for a lamp.
So: if your screen feels harsh in a dark room and your eyes tire at night, you want bias lighting behind the monitor to fix the contrast. If your desk is dim and you need more light on the keyboard and papers but have no room for a lamp, you want a light bar on top of the monitor. The two do not conflict, and plenty of setups benefit from both — a light bar handling the task layer and a bias strip handling the accent layer.
How Lighting Affects Digital Eye Strain
It is worth being precise about digital eye strain, because there is a great deal of confusion — much of it sold to you — about what actually causes it. The medical consensus is clear, and it points at lighting far more than at screens themselves.
The American Academy of Ophthalmology is direct on this: the eye strain from computer work is caused by the way we use screens, not by any damage from the light they emit. The three real mechanisms are glare and contrast (the bright-screen-against-dark-room problem this whole guide addresses), reduced blinking (your blink rate drops by more than half when you concentrate on a screen, which dries the eye surface and produces that gritty, burning feeling), and sustained near-focus (the small focusing muscles inside the eye stay contracted for hours). Notice that two of the three are lighting problems, and the third has a lighting-based remedy.
That remedy is the 20-20-20 rule, endorsed by the AAO and the Mayo Clinic: every 20 minutes, look at something at least 20 feet away for at least 20 seconds. Looking into the distance lets the eye’s focusing muscles relax and, if you position your desk so a window or a far wall is in view, gives you something genuinely distant to focus on. It is the simplest and most effective defense against near-focus fatigue, and it costs nothing. The AAO also recommends matching your screen brightness to the surrounding room — the same principle behind bias lighting — and keeping the screen clean and glare-free.
On blue light specifically, let me be plain and non-alarmist: the AAO does not recommend blue-light-blocking glasses for computer use, because there is no good evidence that screen blue light damages the eye or is a meaningful cause of digital eye strain. The strain is contrast, glare, and dryness — fix those. Blue light’s one genuine effect is on sleep timing: bright, cool light late in the evening can nudge your internal clock and make it harder to wind down. That is a real reason to warm your lighting to 2700K to 3000K at night, not a reason to buy tinted glasses. If persistent eye discomfort continues after you have corrected the lighting, that is a conversation for an eye doctor, not a gadget purchase.
Three-Point Lighting for Video Calls
Video calls are where lighting stops being invisible. A good setup makes you look present, healthy, and intentional; a bad one makes you look tired, shadowed, or like a silhouette in witness protection. The technique that fixes it is borrowed from film and photography — three-point lighting — but for a video call you can approximate it with a couple of lights and the window you already have. The craft blogs will teach you the three positions; what they usually skip is why each light is there, which is what lets you improvise with whatever you have.
The key light is your main, brightest light, and it is the one that does the heavy lifting. Place it in front of you and slightly to one side — roughly 30 to 45 degrees off center — and slightly above eye level so it lights your face evenly. The reason for the off-center angle is that light hitting your face straight-on flattens it and erases the natural contours, while light from a steep overhead angle drops shadows into your eye sockets. A 45-degree front-side position gives your face gentle, natural-looking dimension. A softbox, a ring light, or even a well-placed desk lamp bounced off a wall all work as a key light. If you have a side window, that window is an excellent free key light — which is another argument for the perpendicular desk position.
The fill light sits on the opposite side of the key and is softer and dimmer. Its only job is to lift the shadows the key light creates so one half of your face is not lost in darkness. The reason it is dimmer than the key is that you want some shadow for dimension — a fill light as bright as the key produces a flat, over-lit look. A fill can be as simple as a second small lamp, a white wall or a piece of foam board bouncing the key light back onto your shadow side, or your ambient room light.
The back light sits behind and above you, out of frame, and lights the back of your head and shoulders. Its purpose is separation: it puts a subtle rim of light on your outline so you stand out from the background instead of blending into it, which is what gives a call a polished, three-dimensional look. It is the light most people skip, and adding even a small one is the single biggest jump in production quality.
Two practical notes. First, connect the lighting to your webcam position — the key light should be on the same side as, or just above, the camera so your face is lit from the direction you are looking, and the webcam itself should sit at eye level so the light and the lens agree. Our webcam roundup covers models with mounts that make eye-level positioning easy. Second, remember that great video presence is lighting and audio — colleagues forgive a soft picture far faster than they forgive bad sound, so pair your lighting upgrade with a proper headset from our USB headset guide. If you are outfitting a remote setup end to end, the work-from-home essentials checklist ties the lighting, camera, and audio pieces together.
Putting It Together
Lighting is the highest-return, lowest-cost upgrade in a home office, and it rewards a small amount of deliberate thought. Start with the three layers — make sure you have ambient fill, a proper task light on the desk, and ideally an accent light behind the screen. Specify the numbers when you buy: 300 to 500 lux on the task area, a tunable 2700K to 5000K color temperature, and CRI 90 or higher. Place the task lamp 16 to 24 inches up, angled 30 to 45 degrees across the desk, on the side opposite your writing hand. Sit perpendicular to your window. Add bias lighting if your screen feels harsh at night, and a light bar if your desk is dim and cramped. And when the camera turns on, borrow the three-point approach — a key light off to one side, a softer fill opposite it, and a back light for separation.
Do those things and the mid-afternoon eye burn, the evening headaches, and the washed-out video-call look all tend to disappear together, because they were mostly the same problem — a room lit by accident rather than on purpose. Lighting is one layer of a well-built workspace; once it is handled, the ergonomic desk setup guide and monitor setup guide take care of the rest.
Frequently Asked Questions
What is the best color temperature for a home office?
How many lux do I need for computer work?
Do I need a monitor light bar or a bias lighting strip?
Does blue light from screens actually cause eye strain?
How should I position my desk relative to a window?
Related Articles
How to Set Up the Perfect Home Office: A Step-by-Step Guide
desk-setup-furniture
Ergonomic Desk Setup Guide: Exact Measurements, Angles, and Adjustments for Pain-Free Work
desk-setup-furniture
7 Best Desk Lamps of 2026
desk-setup-furniture
7 Best Monitor Stands of 2026
desk-setup-furniture
7 Best Monitor Arms of 2026
desk-setup-furniture
About the Reviewer

Sarah Chen, CAP, PMP
B.A. Business Administration, UCLA
Sarah Chen spent 10 years in office management and operations at Fortune 500 companies before founding DeskRated in 2026. After managing supply budgets for teams of 50+ people and testing thousands of products through daily use, she started writing the honest, no-fluff supply reviews that office professionals actually need. Sarah holds both CAP and PMP certifications and is based in Los Angeles.