How to Bind a Book: Every Method from Hand-Sewn Signatures to Office Binding Machines
A complete guide to binding a book: paper grain, pamphlet stitch, hardcover case binding, perfect binding with glue, all the machine methods, page-count limits, costs, and fixes.
Updated
Two different questions hide inside “how to bind a book.” One is a craft question: making a book by hand, with folded signatures, waxed thread, cloth-covered boards, and a spine that looks like it came off a nineteenth-century shelf. The other is an office question: a stack of printed pages, a manuscript, a thesis, or a proposal that needs to be held together in a way that looks finished and survives being carried around. Almost every guide answers one and ignores the other. This one covers both, because the honest answer for a lot of people is that they were about to spend a weekend on the wrong one.
My background is office systems rather than the bench. As a Certified Administrative Professional I have specified paper, run years of documents through comb and coil machines, and worked out where a print shop stops being worth it, so the decision framework, the page-count thresholds, and the cost structure are where I can tell you what I have watched go wrong. The hand-binding steps below are standard practice rather than personal mastery, written plainly, in order, with the failure modes named.
Read the decision table before you cut anything. Most frustration in bookbinding is not clumsy hands. It is picking a method that was never going to work for the page count, the paper, or the purpose.
What You’ll Need
For hand binding, the working kit is short and most of it lasts decades.
- Bone folder. Creases folds sharply and rubs down glued paper without shining it. The most useful tool on the list.
- Awl or bradawl. Pierces sewing holes. A proper awl makes a round hole that closes back around the thread; a pushpin does not.
- Waxed linen thread. Strong and low-stretch. The wax stops tangling and helps knots hold.
- Bookbinding needle. Blunt-tipped, large-eyed. A tapestry needle substitutes fine.
- Bookbinding PVA. Acid-free, flexible when dry, brushed on thin. The adhesive for spines, cases, and endpapers.
- Binder’s board or greyboard. Dense and rigid, for hardcovers. Thick mat board is a usable stand-in.
- Bookcloth, or heavy paper for a softcover. Cloth is backed so glue does not strike through to the face.
- Cutting mat, metal straightedge, sharp blade. Not a plastic straightedge. Blades dull fast on board.
- Scissors for thread, cloth, and corners; our scissors guide covers which ones hold an edge.
- Weights or a press. Two heavy books and a flat board work. Glue needs pressure while it dries, and skipping this is where most warping starts.
- Paper. Text weight for pages, heavier stock for endpapers. Grain matters more than brand, and the printer paper roundup notes which reams fold cleanly.
For office binding the list is shorter: a punch-and-bind machine, matching supplies, and covers. Thermal binding needs only a heating unit and pre-glued covers.
First, Check Your Paper Grain
This step separates a book that stays flat from one that ripples, and it appears in almost no beginner tutorial.
Paper is a mat of cellulose fibers, and in manufacture most of those fibers end up aligned in one direction. That alignment is the grain. Paper folds cleanly along the grain and cracks across it, and it expands and contracts with humidity mainly across the grain rather than along it.
For a book the rule is absolute. Grain must run parallel to the spine, on the pages, the endpapers, and the cover boards. Oriented correctly, humidity makes the pages swell and shrink in the direction the spine can absorb. Oriented wrongly, every page pushes outward against a spine that cannot move, and you get wavy pages, a bowed text block, covers that curl instead of lying shut, and a case that warps within a season. Pressing does not fix cross-grain construction. It is a permanent defect built in at the first cut.
Two tests find the grain in seconds. Bow a sheet gently between both hands, turn it ninety degrees, bow it again: it flexes with noticeably less resistance along the grain. If that is ambiguous, tear a strip off each edge. A tear along the grain runs straight; a cross-grain tear wanders and feathers. Board tests the same way.
Most letter-size copy paper is long grain, so folding it in half the short way puts the grain parallel to the fold. That stops being automatic the moment you cut sheets to a custom size, which is where cross-grain pages sneak in unnoticed.
How to Bind a Book by Hand: Pamphlet Stitch
Pamphlet stitch is the beginner method and the fastest route to a finished object. The whole book is one folded stack sewn through the fold.
- Cut or select paper, grain parallel to the intended fold. Use up to twenty sheets; beyond that the fold bulges.
- Fold each sheet individually and crease hard with the bone folder, then nest them. Folding one at a time rather than as a stack gives a much flatter result.
- Fold a cover from heavier stock and nest the signature inside it.
- Mark three holes on the fold: one centered, one about an inch from the head, one an inch from the tail.
- Pierce with the awl from the inside out, with the signature laid open over a folded towel so the awl has somewhere to go.
- Cut thread roughly three times the height of the book. Do not knot the end.
- Sew the three-hole pattern. From the inside, out through the center hole, leaving a tail. In through the top hole. Along the inside, out through the bottom hole. Back in through the center, coming up on the opposite side of the long stitch from your tail.
- Tie off. Pull both ends snug, even the tension along the fold, and tie a square knot around the long center stitch.
- Trim the fore edge with a straightedge and a fresh blade if the inner pages protrude, or leave it deckled.
- Press flat overnight under weights.
A five-hole version of the same pattern supports taller books. That is the only change needed to scale it.
How to Bind a Hardcover Book (Case Binding)
Case binding sews the pages into a text block, builds the cover separately as a “case,” then glues the two together. Building them separately is what makes the result look manufactured rather than homemade.
1. Fold your signatures. Group pages into signatures of four to six folded sheets, giving sixteen to twenty-four pages each. Crease with the bone folder, grain parallel to the fold.
2. Punch the sewing stations. Jog the folded signatures square at head and spine, then mark four to six evenly spaced stations across the spine with the outermost pair set in from the ends. Draw a pencil line across the closed spine to mark all signatures at once, then pierce each one individually.
3. Sew the signatures together. Use a linked or kettle stitch: sew through the first signature, link into the second, and at each end of each signature tie into the stitch below so the signatures lock to one another. For a stronger spine, sew over two or three cloth tapes laid perpendicular to the folds, leaving an inch of tape hanging out both sides. Those tape ends are what keeps the book attached to its cover.
4. Glue up the spine. Clamp the sewn block between two boards with the spine protruding slightly. Brush a thin coat of PVA over the spine, working it between signatures without flooding them, let it set, then add a second thin coat. Thick glue dries into a rigid slab that cracks.
5. Add mull and endpapers. Glue open-weave cotton gauze over the spine, cut shorter than the spine height and wider by an inch each side so the flaps extend onto the outer pages. Then fold a heavier sheet for each end, glue a narrow strip along its fold, and attach one front and one back. Endpapers hide the mull and tape ends and carry the load between block and boards. Headbands are decorative and optional.
6. Build the case. Cut two boards to the text block height plus about an eighth of an inch top and bottom, and to its width minus the hinge allowance. Cut a spine strip from thinner card. Lay boards and spine strip on the bookcloth with a gap of roughly two board thicknesses between them, glue down, trim the cloth corners on a diagonal, and turn the edges in. A craft cutting machine makes short work of board cuts and decorative covers.
7. Case in. Glue the outer face of each endpaper plus the tape and mull flaps, position the text block with even margins on three sides, close the covers, and work the cloth into the hinge groove with the bone folder.
8. Press. Put waxed paper between the endpapers and the text block so moisture does not travel, then press flat under heavy weights overnight, preferably twenty-four hours. Skipping the press is the most common cause of warped covers on an otherwise well-made book.
How to Bind a Book with Glue (Perfect Binding)
Perfect binding is what most paperbacks use: pages held by adhesive along a flat spine rather than by sewing. At home it takes an evening, most of it drying.
- Jog the stack square. Tap the sheets until the spine edge is flush. Any sheet sitting proud will fall out later.
- Clamp it between two boards with about a quarter inch of spine edge exposed.
- Rough the spine edge with coarse sandpaper, or cut shallow diagonal notches every half inch. Both give the glue more surface and let it penetrate between sheets. Skipping this is why home-glued books shed pages.
- Apply PVA in thin coats. Brush a thin layer, let it go tacky, add a second. Hot-melt from a glue gun holds for a while and then yellows and cracks.
- Add a spine liner. A strip of mull over the wet spine, extending half an inch onto the front and back pages, roughly doubles the durability.
- Attach the cover. Score the cover stock at both spine edges so it hinges cleanly, then glue the spine area to the block.
- Dry under pressure overnight, still clamped, spine free to breathe.
Perfect binding needs roughly twenty-eight pages before the spine is wide enough to print on, and scales into the several hundreds. It does not open flat, and forcing it flat is what breaks the spine.
Book Binding Types: Every Method Worth Knowing
Saddle stitch. Folded sheets stapled through the fold, the standard for booklets and programs. Needs a multiple of four pages, minimum eight, and stops working past about ninety-two. Pamphlet stitch is the sewn version: same range, no metal, better looking.
Japanese stab binding. Sewn through the face of the stack near the spine edge in a decorative pattern. It works with single loose sheets, which makes it ideal for printed pages that were never folded. It does not open flat, so leave a wide inner margin.
Coptic stitch. Chain-stitched signatures with an exposed spine and no glue. Opens a full 360 degrees and lies dead flat, which is why sketchbook makers favor it. The exposed spine is either the appeal or the objection.
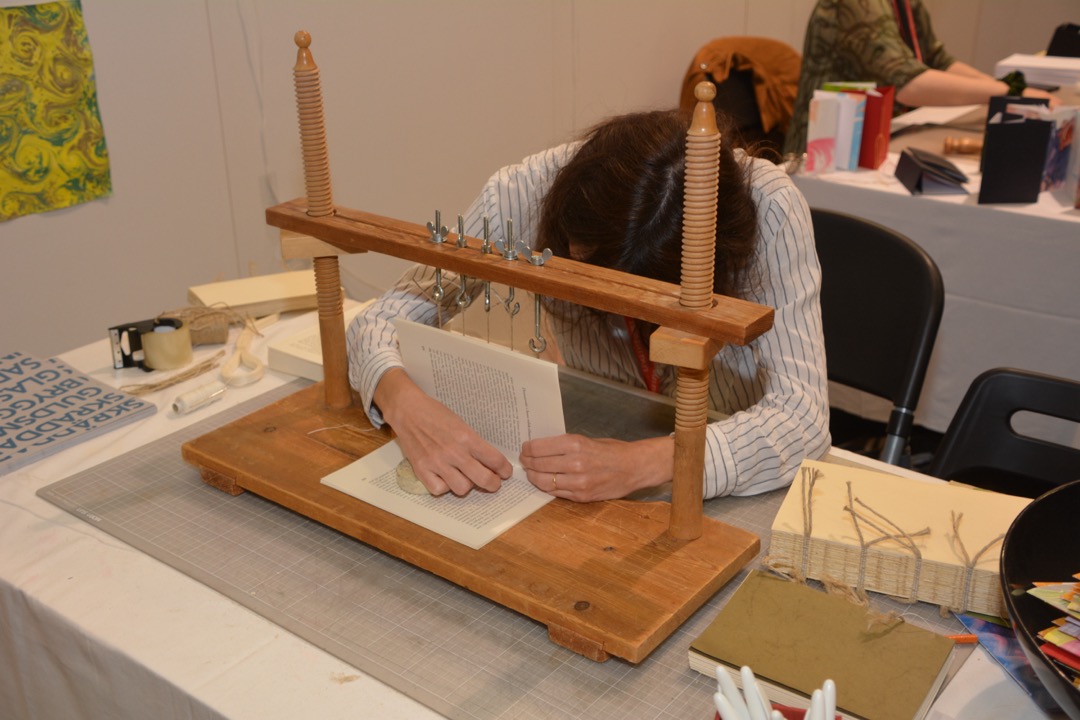
Sewing on tapes or cords. The traditional structure underneath a proper hardcover, and the one being worked on a sewing frame. Strong, repairable, built to last a century.
Screw post binding. Two or three posts through punched holes. Holds thick stacks, lets pages be added or removed, needs no skill.
The machine methods. Coil is a plastic spiral and twin-loop is a double wire, both threaded through punched holes and both opening a full 360 degrees; coil survives rough handling better, wire looks sharper. Comb uses curved plastic teeth opened on a machine, has the thickest capacity, and reopens so contents can be edited. Thermal uses a pre-glued cover activated in a heating unit, looks closest to a paperback, and is limited by the hot-melt.
Leather binding. A case binding finished in leather rather than cloth. The sewn text block underneath is identical; what changes is the covering material and the skill of paring the leather thin enough to turn cleanly over the board edges and into the corners. Full leather covers the whole case, half leather covers spine and corners, quarter leather covers only the spine. A poor first project and a reasonable fifth one.
Which Binding Method Should You Choose?
| Method | Page range | Skill level | Opens flat | Permanence | Best for |
|---|---|---|---|---|---|
| Saddle stitch (staples) | 8 to 92, multiples of 4 | None | Mostly | Low | Programs, zines, short booklets |
| Pamphlet stitch | Up to about 80 | Beginner | Mostly | Medium | First handmade book, notebooks |
| Japanese stab | Any, loose sheets | Beginner | No | Medium | Loose printed pages, decorative work |
| Coptic stitch | 60 to 400 | Intermediate | Yes, 360 degrees | High | Sketchbooks, journals |
| Sewn on tapes (case bound) | 60 to 800 | Advanced | Good | Very high | Heirloom books, hardcovers |
| Perfect binding (glue) | 28 to 700 | Beginner | No | Medium | Manuscripts, paperbacks, photo books |
| Screw post | 10 to 300 | None | Close to flat | Editable | Portfolios, documents still changing |
| Comb | 10 to 425 | None | Close to flat | Editable | Manuals, thick reports |
| Coil | 10 to 200 | None | Yes, 360 degrees | Medium | Cookbooks, workbooks, lab notes |
| Twin-loop wire | 10 to 250 | None | Yes, 360 degrees | Medium | Proposals, presentations |
| Thermal | 10 to 340 | None | No | Low to medium | Client documents, quick finish |
| Ring binder | Any | None | Yes | Fully editable | Anything revised regularly |
Read the table by whichever column is a hard requirement, then choose within what is left.
Two of those columns are hard filters. If the book must stay open on a counter or a music stand, the glue methods are out. If the contents will keep changing, only screw posts, combs, and rings stay on the list, because sewn and glued bindings are permanent by design. Page count then eliminates most of what remains, so count first, covers included. Time is the last filter: a case-bound hardcover is several hours plus overnight pressing, and a coil bind is ninety seconds. On durability the order runs sewn, screw post, coil and wire, perfect binding, thermal, staples.
One thing that gets missed: if the content exists only on paper and you are about to bind it permanently, scan it first. A document scanner makes a searchable archive in minutes, and a bound original with no digital copy is one coffee spill away from gone.
What It Actually Costs to Bind a Book
Cost structure is more useful than any number, because numbers change and structure does not. Three things drive cost and they behave differently.
Materials are per-book and mostly small: paper, thread, glue, board, cloth, or the comb, coil, and cover supplies. They scale linearly. Ten books cost ten times one book.
Tools are a one-time purchase spread across every book you ever bind. A bone folder, an awl, a needle, and a straightedge do not wear out. A binding machine is the same logic at a larger scale: its cost amortizes per document, which is why it looks absurd for one report and cheap by the fiftieth. That is the asymmetry against a print shop, which charges per unit forever and amortizes nothing.
Labor is per-book and never amortizes either. A hand-sewn hardcover is several hours on the first copy and roughly the same on the tenth. People ignore this when comparing hand binding to a print shop, and it is usually the largest of the three.
Ranked cheapest to most expensive per finished book: saddle stitch, pamphlet stitch, perfect binding with PVA at home, comb or coil or thermal on a machine you already own, screw post, a print shop per copy plus setup, a hand-sewn case binding once you price your own hours, and a full leather binding at the top.
The crossover logic follows. One copy, one time: print shop or hand binding, because no equipment purchase pays for itself on a single book. A small batch, a few times a year: hand methods win, since materials are cheap per unit and shop setup fees are charged per job. Recurring volume, every week: buy the machine. The shop’s setup fee recurs with every order, while the machine’s cost is one fixed number divided by an ever-growing pile of documents. Two costs get forgotten: shops price printing separately from binding, and test copies are real.
Common Bookbinding Mistakes and How to Fix Them
The cover will not stay shut. Almost always cross-grain board or pages. Flex a spare of each to confirm. Pressing helps a little; the real fix is rebuilding the case with correctly oriented board.
Warped or bowed covers. Too much glue, drying without pressure, or wet adhesive on only one face of a board, which swells that side and curls it. Thin coats, and press immediately after casing in.
Wrinkled or bubbled lining paper. Paper stretches when wet and shrinks as it dries, so working slowly lets it expand before contact and it bunches. Brush glue from the center outward, place the sheet in one motion rather than repositioning it, and smooth outward with the bone folder over a scrap sheet so you do not burnish the surface.
Fabric puckers when glued to boards. Too much glue, unbacked fabric letting adhesive strike through, or pulling the cloth to reposition it. Use proper bookcloth or back your fabric with thin paper, apply glue to the board rather than the fabric, and lay the board onto the cloth instead of the reverse.
Pages fall out of a glued spine. The spine was not roughed, the glue went on as one thick coat, or a hot-melt was used. Sand or notch the spine, use two thin coats of flexible PVA, add a mull liner.
The signature bulges at the fold. Too many sheets in one signature. Four to six folded sheets is the maximum. Split it in two and sew them together.
Uneven fore edge. Normal on a thick nested signature, because inner sheets travel further around the fold. Trim after sewing, or accept it as deckled.
Thread breaks or the sewing goes slack. Unwaxed thread, holes pierced too large, or tension pulled across the spine instead of in line with the stitch.
Glue squeezes into the hinge and locks the cover to the text block. Keep the glue line back from the hinge groove and use waxed paper to isolate anything you do not want stuck together.
Store unfinished work flat and dry between sessions. Loose signatures waiting to be sewn keep their shape far better in a file folder than in a stack on the desk.
Binding Documents at the Office or School
Most people searching for how to bind a book do not want a hand-sewn hardcover. They want a report, a manual, a thesis, or a proposal to look finished, and the office methods do that in minutes.
Comb is the workhorse. Thickest capacity, cheap supplies, and a comb reopens on the machine so pages can be added or removed, which makes it right for anything that gets revised. Wide combs take a printed spine title.
Coil is the pick when the document must lie flat or fold all the way back on itself: cookbooks, workbooks, lab manuals, anything used while someone’s hands are busy.
Twin-loop wire looks the most professional of the three and also opens fully flat, which is why it is standard for client proposals. A closed wire cannot be reopened, so the document must be final.
Thermal binding gives the closest thing to a paperback with the least equipment. The hot-melt means it is not the choice for anything expected to survive a decade of handling.
A ring binder is genuinely the right answer more often than people admit. If the document is revised monthly, if sections get swapped, if different recipients need different subsets, or if it has to accept inserts later, binding it permanently works against you. Our binders roundup covers the ring mechanisms and cover constructions that survive daily use.
Two finishing touches worth the extra minute. A laminated cover resists the wear that makes a bound document look tired within a month, and a laminator earns its place quickly in any office producing client-facing work. A printed spine label makes a shelf of bound reports usable rather than decorative, and a label maker does that better than a handwritten strip.
If you are making a book rather than binding a document, two adjacent guides pair with this one. Handmade covers and title pages are a natural application for calligraphy. And if what you want is a well-made blank book to write in rather than a weekend project, the journals and notebooks roundups get you there faster and probably better. Buying the book and binding the book are both correct answers to different questions, and it is worth being honest about which one you have.
Start with the paper grain, pick the method your page count allows, use the right adhesive, and press everything longer than you think you need to. Those four decisions account for most of the difference between a book that holds together and one that does not, and none of them require years of practice. They require doing them in order.
Frequently Asked Questions
What is the easiest bookbinding method for a beginner?
Does Elmer's glue work for bookbinding?
How expensive is it to bind a book?
Is it legal to rebind a book and sell it?
How do I bind loose pages into a book without a needle?
Related Articles
About the Reviewer

Sarah Chen, CAP, PMP
B.A. Business Administration, UCLA
Sarah Chen spent 10 years in office management and operations at Fortune 500 companies before founding DeskRated in 2026. After managing supply budgets for teams of 50+ people and testing thousands of products through daily use, she started writing the honest, no-fluff supply reviews that office professionals actually need. Sarah holds both CAP and PMP certifications and is based in Los Angeles.