How to Set Up a Classroom: A Complete Guide for New and Returning Teachers
Sarah Chen, CAP, PMP, breaks classroom setup into a five-zone framework and a phased setup-week timeline — with hour estimates, a budget reality check, and a tech-station plan.
Updated
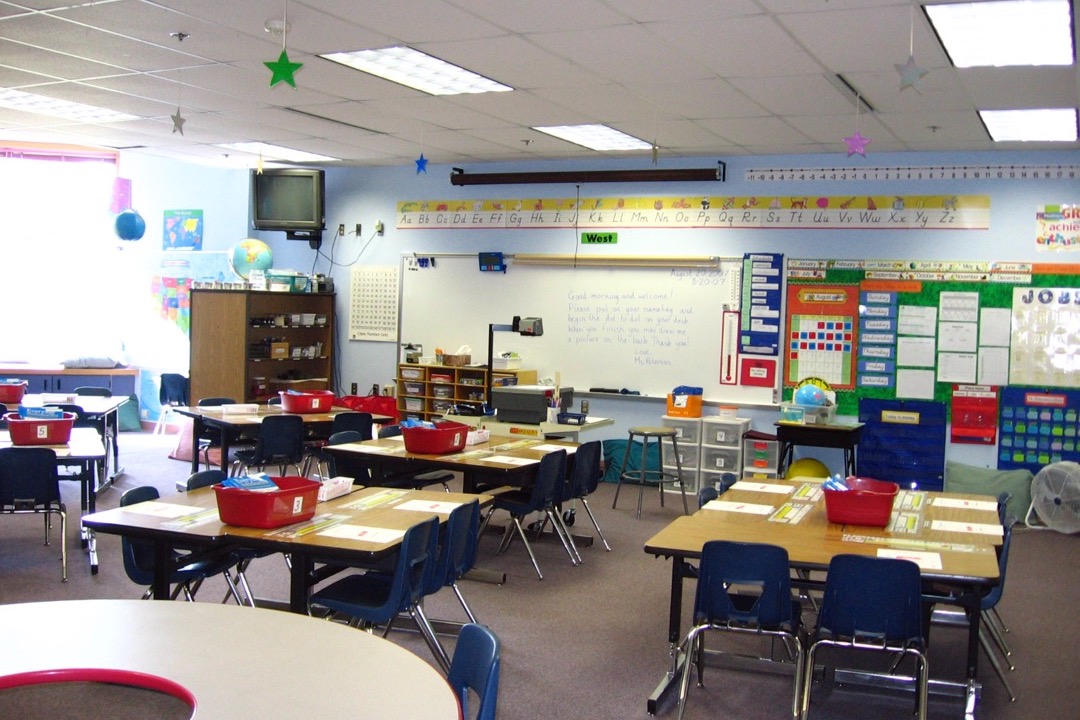
Walk into any classroom the week before school starts and you will see two kinds of teachers. The first is surrounded by butcher paper and borders, three hours into a bulletin board, with the furniture still pushed against the walls and not a single supply bin labeled. The second has a sketch on a clipboard, has already arranged the desks, and is methodically working through a list. Both will have a finished room by the first day. Only one of them will have a room that actually works — and will have gotten there without the late-night panic.
I have spent years coordinating office and workspace setups as a Certified Administrative Professional and a project manager, and a classroom is, at its core, the same kind of problem: a finite space, a fixed deadline, a limited budget, and a set of systems that either run themselves or eat your time every single day. The teachers who struggle are almost never the ones who lack good taste or good intentions. They are the ones who started with the most visible task instead of the most foundational one. This guide treats your classroom setup the way I would treat any project with a hard deadline — as a sequence of phases, each one building on the last, with the high-value structural work front-loaded and the decorating saved for the end where it belongs. Whether you are setting up your very first room or refreshing one you have taught in for a decade, the framework is the same.
Why Your Classroom Setup Matters More Than You Think
The physical environment of a classroom is not background. A growing body of education research treats the room itself as a teaching tool — one that either supports the learning you are trying to do or quietly works against it all year. A frequently cited University of Salford study found that classroom design factors, including layout, flexibility, light, and complexity, accounted for a meaningful share of the variation in pupil learning progress over a school year. The room is not decoration around the teaching. It is part of the teaching.
The practical version of this for a teacher standing in an empty room is simpler. A classroom that flows reduces the number of decisions you have to make every day. When supplies have an obvious home, students put them away without being told. When the traffic path from the door to the desks does not cut through the small-group table, you stop refereeing collisions. When your most-used materials are within arm’s reach of where you teach, you stop interrupting lessons to hunt for a marker. Every one of these is a small tax, and a poorly designed room charges it dozens of times a day, every day, for 180 days.
There is also a classroom-management dimension that new teachers learn the hard way. Sightlines determine whether you can see every student from anywhere in the room — and students know within the first week whether you can. Clear zones tell students what kind of behavior belongs where, which means the room itself does part of your management for you. The goal of a good setup is not a magazine-ready space. It is a space where the room does work so you do not have to. That payoff compounds over the whole year, which is exactly why the hours you invest in the setup week are some of the highest-leverage hours you will spend.
Before You Walk In the Door: The Pre-Setup Phase
The most valuable work in a classroom setup happens before you touch a single piece of furniture. Project managers call it the planning phase, and skipping it is the single most common reason setups run long and have to be redone. Before you go into the building — ideally while you still have a quiet kitchen table and a cup of coffee — gather four pieces of information: your class roster and any student accommodations you can access, a rough floor plan or at least the dimensions of your room, an inventory of what furniture and technology the room already contains, and a clear sense of how you actually intend to teach. That last one drives everything. A teacher who runs station rotations needs a fundamentally different layout than one who lectures and assigns independent practice.
Then sketch the room on paper before you move anything heavy. A scale sketch — even a rough one on graph paper or a free floor-plan app — costs you thirty minutes and saves you hours of shoving filing cabinets across the room by trial and error. Mark the fixed constraints first: the door, the windows, the electrical outlets, the network drops, the sink if you have one, and the wall where your board and projector will live. These are the things you cannot move, so they anchor everything else. Only once the fixed points are on paper do you start placing furniture into zones.
The 5 Zones Every Classroom Needs
Every functional classroom, regardless of grade or subject, is built from the same five zones. They do not have to be physically separated — in most rooms they overlap and share square footage — but each one needs a clear home so that you and your students always know where a given activity happens.
The instruction zone is where whole-group teaching happens. It contains your primary board, your projector screen, and the front-of-room space where you stand to deliver lessons. It needs the clearest sightlines in the room and enough open floor for a gathering rug in younger grades. Because the projector’s reach and your board placement are fixed by the room’s geometry, this zone is usually the first one you lock down.
The collaboration zone is where students work in groups. In most elementary and middle-school rooms this is simply the way the student desks are clustered, so the collaboration zone and the seating overlap completely. It needs enough space between clusters for you to circulate to every group.
The quiet or independent-work zone is for focused individual tasks, testing, and the students who need a lower-stimulation spot to concentrate. Even a single small table or a few desks turned toward a wall can serve this purpose. It belongs away from the high-traffic door and the collaboration zone’s noise.
The teacher zone holds your command center — your desk, your planner, your most-used supplies — and ideally a small-group table where you pull students for targeted instruction. Position it so you can see the entire room from where you sit, and so the small-group table faces the class rather than turning your back to it.
The resource and supply zone is where shared materials, the classroom library, and technology live. It needs to be accessible to students without their path cutting through instruction, and it is where most of your organizational systems — labeled bins, book baskets, a charging station — will concentrate.
Phase 1 — Clean, Then Plan Your Layout
With your sketch in hand, the first physical phase begins with an empty, clean room. Push everything to the center or out into the hall, and actually clean the surfaces, shelves, and floors before anything goes back. Custodial staff handle the deep cleaning, but the inside of cabinets, the tops of shelves, and the previous teacher’s leftover supplies are yours to deal with, and you only get one easy shot at it while the room is empty. Cleaning first also forces you to take a real inventory of what you have, which often changes the plan you sketched at home.
Then place the large furniture according to your sketch, starting with the immovable anchors — the board, the projector, the teacher zone with its sightlines — and working outward to the student desks last. Place big pieces before small ones, and walk the traffic paths physically before you commit. Stand at the door and trace the route a student takes to their seat, to the supply zone, to the pencil sharpener, and to the door again. If any of those paths cuts through your small-group table or crosses the front of the instruction zone during a lesson, fix it now while the furniture is light and empty.
Desk Arrangement Options
There is no universally correct desk arrangement; there is only the arrangement that matches how you teach, and you should expect to change it more than once a year. Groups of four to six desks are the default for collaborative, discussion-heavy, and project-based classrooms, and they suit most elementary and middle-school teaching — the tradeoff is more off-task chatter and the need to manage group dynamics. Rows maximize independent focus and minimize distraction, which makes them right for testing, direct instruction, and some content-heavy secondary courses. Pairs are the middle ground, supporting partner work without the energy of larger clusters. A horseshoe or U-shape puts every student in one another’s sightline and is unbeatable for discussion and seminar formats, though it consumes floor space and works best in smaller classes. Start with the arrangement that fits your dominant instructional mode, and treat it as a starting point rather than a permanent decision.
Where to Put the Teacher Desk
The teacher desk is one of the most over-prioritized pieces of furniture in a classroom. Many experienced teachers shrink it dramatically or push it to a back corner, because the truth is you will spend very little of your teaching day sitting at it. Whatever size you keep, place it where you have a clear line of sight to the entire room — a back corner often works better than the front, because from the back you can see every screen and every face during independent work. Do not place it where it blocks a traffic path or where its bulk eats into the instruction or collaboration zones. The small-group table, where you actually pull students, deserves the better real estate.
Seating Comes After Accommodations — A Legal Note
Before you finalize any seating chart, review your students’ IEP and 504 plans, because some accommodations are legally binding and dictate seating directly. Preferential seating near the front, proximity to the teacher, a spot away from high-traffic and high-distraction areas, access for a wheelchair or other mobility device, and a clear line of sight to the board for students with hearing or vision needs are all common accommodations that the law requires you to honor. Seating is one of the few setup decisions with legal weight, so it comes before aesthetic preference, not after. Build the accommodation-driven placements into the chart first, then arrange everyone else around them.
While you are mapping movement, design your transition spaces deliberately. The areas around the door, the supply zone, the pencil sharpener, and the turn-in tray are where traffic concentrates and where bottlenecks and behavior problems cluster. Give these spaces enough clearance that two students can pass, and locate the high-traffic destinations away from where students are trying to do focused work. A well-designed transition space is invisible when it works and a daily aggravation when it does not.
Phase 2 — Organize Before You Decorate
Once the furniture is placed, build your organizational systems before you put anything on the walls. This is the phase that determines whether your room runs itself in October or whether you are still answering “where does this go?” forty times a day. The principle is simple: every category of material gets a defined home, and every home gets a label.
Supply stations are the heart of it. Group like materials into clearly labeled, student-accessible bins and baskets — one bin for scissors, one for glue, one for colored pencils, one for markers, and so on — and place them in the resource zone where students can reach them without crossing the instruction zone. A label maker earns its keep here; a labeled bin is a bin that students refill and reshelve correctly without being told, and our roundup of the best label makers covers the durable laminated-tape machines that hold up to daily classroom handling. Stock the stations with the consumables students reach for constantly — the best glue sticks that actually bond and do not dry out, washable markers for kids that survive being left uncapped, and a full range of colored pencils for the art and diagram work that fills an elementary day. Decide early whether supplies are communal (pooled in shared bins) or individual (kept in desks), because that single decision shapes how the whole supply zone is organized.
Your teacher command center is the small footprint of organization that runs your own day. It holds your teacher planner — the single document that keeps your week coherent — along with your grade book, your most-used reference materials, and the supplies you reach for during instruction. Keep a dedicated stash of dry erase markers here that students do not raid, because a dead marker discovered mid-lesson is a small disaster that repeats itself daily when you do not protect your supply. The command center should sit within arm’s reach of where you teach, not buried in the teacher desk where you have to walk away from the class to use it.
Pencil sharpener placement sounds trivial and is not. A wall-mounted or electric sharpener is a magnet for traffic and noise, so place it where a line of students waiting to sharpen will not cut across the instruction zone or crowd a quiet-work area — near the supply zone, away from your small-group table, is usually right. Many teachers eliminate the problem entirely with a community cup of pre-sharpened pencils and a separate cup for dulls, sharpening a batch themselves rather than letting the sharpener become an all-day distraction. Whichever you choose, decide it now and build it into the traffic plan, because a sharpener in the wrong spot generates interruptions all year.
Phase 3 — Set Up Your Technology and Tools
Technology comes after furniture and organization but before decorating, and the order is not arbitrary: technology placement dictates furniture placement, so it has to be settled before the walls get covered. This is also the phase that new-teacher guides consistently underweight, even though a dead projector bulb or a clicker that will not pair can derail a lesson far faster than a missing border. Test everything with a real lesson file, not a power-on check, so you discover the missing adapter or the login problem while there is still time to fix it.
Start with the board, because everything in the instruction zone orients around it. Position your primary writing surface where every student — including those with vision-related accommodations — can read it without glare from the windows. If you are choosing or replacing a board, the best whiteboards roundup walks through why surface quality and size matter more than price for a surface you will write on thousands of times, and a magnetic surface pays for itself in the flexibility to post anchor charts and student work without tape.
The projector is the device that most constrains your room, because its throw ratio determines how far it must sit from the wall to fill your board. Measure your throw distance before anything else; a short-throw or ultra-short-throw model that mounts close to the wall eliminates the shadows and beam-in-the-eyes problem that plague standard-throw projectors in a room where students walk past all day. Confirm the projected image is bright enough to read from the back row with the lights on and the blinds open — a classroom needs real brightness to compete with daylight. Our guide to the best classroom projectors breaks down throw ratio and lumens in the context of an actual classroom rather than a home theater.
A presentation clicker is the cheapest mobility upgrade in the room and one of the most underused. A remote with at least fifty feet of range frees you from the keyboard so you can advance slides from anywhere — beside a struggling student, at the back of the room managing behavior, crouched at a group’s desk. Favor a plug-and-play USB receiver over Bluetooth pairing in a building saturated with competing wireless signals, and pick a model with a button layout you can operate by feel. The best presentation clickers coverage focuses on range and reliability, which are the specs that actually matter in a classroom.
Finally, build your laminator and label-maker station. A laminator turns single-use paper into reusable, write-on materials that survive years of handling, and it is one of the highest-return durable purchases a teacher makes — match your pouch thickness to the work, with thin pouches for everyday labels and thicker pouches for rigid centers materials. The best laminators guide covers pouch compatibility and throughput, which is what keeps the machine from becoming a bottleneck when you are laminating a class set the week before school. Pair it with your label maker, and you have a workflow that produces the durable, legible labels that make the whole organizational system run.
Phase 4 — Functional Wall Displays Before Decorative
Only now, with furniture, systems, and technology in place, do you start on the walls — and even here, function comes before decoration. The first things that go up are the displays students will actually use every day, not the borders and the inspirational quotes. Put up the daily schedule where the whole room can see it, because a visible schedule answers the most-asked question in any classroom and reduces transition anxiety, especially for younger students and those who thrive on predictability. Reserve prime wall space near the instruction zone for anchor charts — the reference charts you build with students during lessons and leave up for them to consult — and resist the urge to cover that space with pre-made decoration, because you will need it all year.
Build in student ownership from the start. A classroom jobs display assigns the small responsibilities that make a room run and gives students a stake in the space. A word wall that grows over the year supports literacy and vocabulary across grades. Leave generous, clearly bordered space for displaying student work, because student-made displays do more for belonging and motivation than any store-bought poster, and a wall that fills with student work over the year stays alive in a way a fully decorated August wall never does. The guiding principle: every display should either be used by students or made by students. If it is neither, it is decoration, and decoration waits for the next phase.
One functional space deserves special mention. A calm-down corner or safe space — a small, low-stimulation area with a comfortable seat and perhaps a few self-regulation tools — gives students a structured place to reset before behavior escalates, and it has become a standard feature of trauma-informed and social-emotional-learning-aware classrooms. It does not need to be elaborate; it needs to be quiet, slightly separated from the high-traffic zones, and clearly understood by students as a tool for self-regulation rather than a punishment. Locating it during this phase, before the decorative layer goes up, ensures it gets real space rather than whatever corner is left over.
Phase 5 — Decorate Strategically (Not Exhaustively)
Decorating comes last, on purpose, and it should take far less time than your instinct wants it to. By this phase the room already works; decoration is the finishing layer that makes it feel welcoming, not the structure that makes it function. The most common new-teacher mistake is inverting this order — spending the first and most energetic days of the setup week on elaborate bulletin boards, then scrambling to arrange furniture and build systems in the exhausted final hours. Reverse that. Spend your freshest hours on structure and your last hours on color.
A few principles keep decoration from working against you. Research on heavily decorated classrooms — including a well-known Carnegie Mellon study on young children — suggests that visually overstimulating walls can pull attention away from instruction, particularly for the youngest students. Leave some wall and ceiling space genuinely empty; the room does not need to be full to be finished. Choose a simple, cohesive color scheme rather than a clashing mix, keep the area immediately around your instruction zone calm so it does not compete with the board, and favor decoration that can flex into function — bordered space that will hold student work, a themed area that doubles as a reading nook. Decoration that you can swap or that students fill in over the year ages far better than a wall that peaks on the first day and only fades from there.
The Classroom Setup Budget Reality (and How to Spend Wisely)
No honest classroom guide can skip the money, because the gap between what schools provide and what classrooms need is real and well documented. According to AdoptAClassroom.org’s 2025 survey, teachers spent an average of roughly $895 of their own money on supplies in a single year, while the median school-provided stipend was only about $200 — and 97 percent of teachers reported that the funding they received was insufficient. First-year teachers building a room from nothing routinely spend up to $2,000 across furniture, storage, technology accessories, and consumables. These are not numbers any teacher should absorb without a plan.
The plan is to sort every potential purchase into three tiers. Tier one is school-funded essentials — the items your building, your grade-level team, your PTA, or a supply stipend should cover. Push these onto the institution before you spend a dollar of your own; ask explicitly what the school provides, because the answer is often more than new teachers assume. Tier two is personal high-impact purchases — the durable, reusable tools that run the room for years and earn their cost back over many school years. A label maker, a laminator, sturdy storage bins, and a good board are tier-two items, and they are where spending your own money is genuinely worth it because the per-year cost is tiny. Tier three is decorative extras — the borders, the themed sets, the seasonal swaps. These depreciate the moment the year ends, and they are where overspending does the most damage to a teacher’s budget for the least lasting return. Spend deliberately on tier two, ruthlessly minimize tier three, and lean on free and donated sources — DonorsChoose, AdoptAClassroom, grade-level swaps, and community donation drives — wherever you can.
One piece of relief belongs in every teacher’s plan: the federal Educator Expense Deduction lets eligible K-12 educators deduct up to $300 of unreimbursed classroom expenses, and because it is an above-the-line deduction you can claim it even if you do not itemize. Qualifying expenses include books, supplies, classroom technology, and similar materials you paid for yourself. The catch is documentation — the deduction is only as good as your receipts, so keep them in one folder or photograph them into a single digital archive as you go. This is general information rather than tax advice, so consult a qualified tax professional about your specific situation, because the rules and limits can change from year to year.
Your Classroom Setup Week Timeline
Here is the whole framework expressed the way a project manager would — as phases with hour estimates, sequenced so each phase enables the next. A first-time setup lands at the high end of these ranges; a returning teacher refreshing an existing room finishes well under it. Print the back-to-school supply checklist before you start so you are not making supply runs mid-phase.
Phase 0 — Planning (2 to 4 hours, at home). Gather your roster and accommodations, room dimensions, and furniture inventory. Sketch the layout on paper, marking fixed constraints first and placing the five zones second. This is the cheapest phase and the one that protects every phase after it.
Phase 1 — Clean and arrange furniture (6 to 10 hours). Empty and clean the room, inventory what you have, then place large furniture from your sketch — anchors first, student desks last. Walk the traffic paths physically and adjust before committing.
Phase 2 — Build organizational systems (6 to 9 hours). Set up supply stations, the teacher command center, and the pencil-sharpener workflow. Label everything. This is the most under-budgeted phase and the one that pays back the most over the year.
Phase 3 — Technology and tools (3 to 5 hours). Position and test the board, projector, clicker, and laminator station with a real lesson file. Confirm readability from the back row. Settle technology before the walls go up.
Phase 4 — Functional wall displays (4 to 6 hours). Schedule, anchor-chart space, jobs, word wall, student-work space, and the calm-down corner. Function before decoration.
Phase 5 — Decorate (3 to 5 hours). The finishing layer. Cohesive, restrained, with empty space left intentionally. Your last and freshest-budgeted hours go here, not your first.
Across all phases that is roughly 24 to 39 hours for a first-time setup — which matches the real-world experience of most new teachers and explains why treating the week as a sequenced project, rather than an open-ended sprint, is what keeps it from swallowing your final days of summer.
Grade-Level Adaptations
The five-zone framework and the phased timeline hold across every grade, but the emphasis shifts as students get older.
Early elementary (K-2) rooms revolve around a gathering space. A large carpet or rug in the instruction zone is essential for circle time, read-alouds, and whole-group lessons, and it often does double duty as the collaboration zone. Everything must be physically accessible to small hands — low shelves, bins at child height, hooks and cubbies they can reach. Picture-and-word labels on every bin support emerging readers, and the calm-down corner carries extra weight at this age. Expect to organize more on the students’ behalf, because the systems are as much about teaching routines as about storing supplies.
Upper elementary (3-5) rooms can hand more responsibility to students. Desks in groups support the collaborative project work that defines these grades, classroom jobs can be more substantive, and the supply stations can be genuinely student-run with the right labeling. The classroom library typically expands and deserves real space and an inviting reading nook. Anchor charts and the word wall do heavier instructional work here, so reserve generous, prime wall space for them.
Middle school (6-8) introduces the wrinkle of multiple class periods rotating through the same room, which changes the calculus. Flexibility matters more than any single fixed arrangement, because the layout that suits first-period writing may not suit fifth-period lab work. Individual ownership shifts toward shared systems that reset cleanly between classes — clearly labeled, communal supplies and a turn-in workflow that forty-plus students per day can run without your intervention. The calm-down corner evolves into a less conspicuous reset space appropriate to the age, and decoration leans toward student-generated and subject-relevant content over the thematic sets that suit younger rooms.
Whatever grade you teach, the discipline is the same one a project manager brings to any deadline-bound build: plan before you move, sequence the phases so structure precedes decoration, front-load the high-value work, and document your spending as you go. Do that, and you will finish your setup week with a room that does part of your job for you — every day, all year. Start with the sketch, work the phases in order, and save the borders for last.
Frequently Asked Questions
How long does it take to set up a classroom for the first time?
How much should I budget for classroom setup?
What are the essential zones every classroom needs?
Should student desks go in rows or groups?
When should I set up technology in my classroom?
What should I set up first in my classroom?
Can teachers deduct classroom setup expenses on taxes?
Related Articles
7 Best Classroom Projectors of 2026
classroom-supplies
Back to School Supply Checklist: A Grade-by-Grade Guide for Parents
classroom-supplies
7 Best Glue Sticks of 2026
classroom-supplies
7 Best Markers for Kids of 2026
classroom-supplies
How to Set Up a Classroom on a Budget: A Teacher's Funding and Spending Playbook
classroom-supplies
About the Reviewer

Sarah Chen, CAP, PMP
B.A. Business Administration, UCLA
Sarah Chen spent 10 years in office management and operations at Fortune 500 companies before founding DeskRated in 2026. After managing supply budgets for teams of 50+ people and testing thousands of products through daily use, she started writing the honest, no-fluff supply reviews that office professionals actually need. Sarah holds both CAP and PMP certifications and is based in Los Angeles.